
⚠ WARNING - READ BEFORE PROCEEDING ⚠
FOR YOUR SAFETY - It is advised that our product be installed and serviced by a contractor who is licensed and qualified in pool equipment or fountains by the jurisdiction in which the product will be installed where such state or local requirements exist. In the event no such state or local requirement exists, the installer or maintainer must be a professional with sufficient experience in pool equipment or fountain installation and maintenance. Before installing this product, read and follow all tips, warning notices and instructions that accompany this product. Failure to follow warning notices and instructions may result in property damage, personal injury, or death. Improper installation and/or operation will void the Lifetime Craftsmanship Guarantee.
Our products suit many different applications and styles of water features. Water feature scupper, spillways and spouts manufactured from Stainless Steel, Copper, Brass and ABS Plastic add unique ambiance and appeal to fountains and pools.
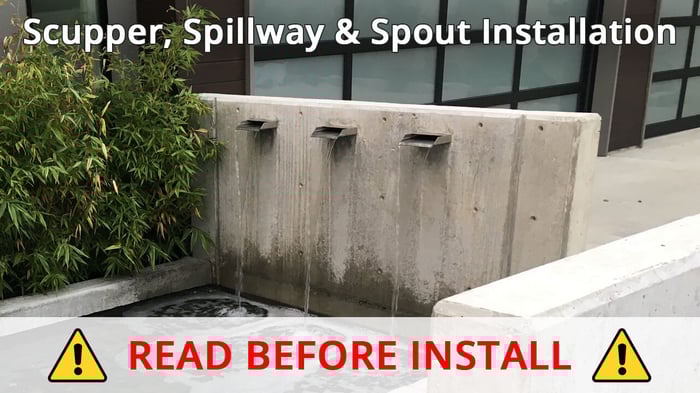
WATER FEATURE SCUPPER/SPILLWAY/SPOUT INSTALLATION TIPS
Safety First!
As with any construction project, safety always comes first. Use eye and hearing protection when necessary, gloves to protect hands, steel toe boots and full-coverage clothes.
When modifying or removing existing structures or components in a pool of fountain water feature, take an abundance of caution to ensure there are no live electrical or other dangerous obstacles.
Handle with Care
Your new pool or fountain water feature scuppers, spillways or spouts are constructed for a long life when installed properly and maybe fragile or dangerous prior to installation. After inspecting up on arrival, replace all products in the original packaging and store where weather, heat and sunlight cannot reach. For longer products, always lay the products box flat on a level surface.
When removing your products from the box and installing the products, take care to not damage the finish on the product. Some products contain sharp corners and edges, where gloves and use caution when handling the product.
Plumbing
Rigid or flexible PVC are suitable for plumbing from your pump to your water feature. The size of the plumbing pipe should match the inlet size and when multiple inlets or products are being installed in a pool or fountain, larger and/or multiple pipes may need to be ran prior to branching. When plumbing pool and fountain spillways, scuppers and spouts with multiple inlets, creation of a loop to equalize water volume is essential.
Ensure that no debris is present in your plumbing to your pool or fountain scuppers, spillways or spouts. Debris may permanently clog your water feature products and require rework.
All water features should be plumbed with a filter/strainer and valves. Filter/Strainers should filter down to at least 1/16" debris and be placed near the water feature. Valves are essential to control the volume of water through your water feature. In pool and fountain water features containing multiple products, each product should have a dedicated valve. For better control of products with multiple inlets, it may be necessary to install valves on branches to each inlet.
When connecting threaded plumbing fittings into the inlets of your pool or fountain spillway, scupper or spout, use silicone or thread sealant (pipe dope) to ensure a leak-free installation.
Bonding/Grounding
*Prior to installation, Consult a licensed electrician to understand the requirements for your local building code and bonding/grounding of water feature products. Many variable such as location and type of water feature must be considered prior to bonding/grounding.
All metal products are offered with a bonding/grounding lug. It's essential and legally required (in most installations) to bond/ground any metal water feature component for safety and product longevity.
Positioning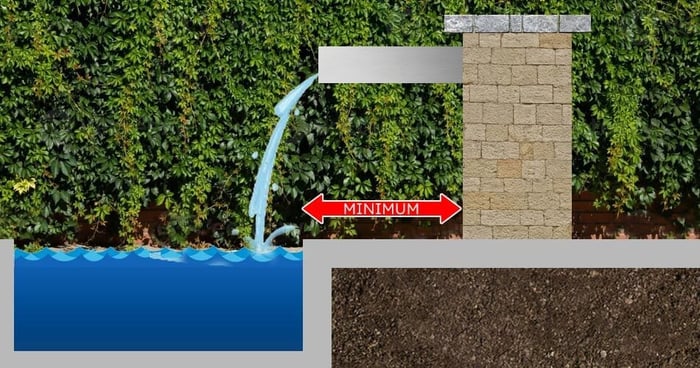
All products should overhang the basin or pool. If is not advised to install water feature products with the end of the products protrusion overhanging portions of a deck or planter. When the pump is switched on or off, the water volume will be low and directly under the lip and while running the product may drip.
Leveling
Upon installation, ensure that the products are level in all planes. Level should be measured across the entire width of the product. For products where a lip protrudes from the pool/fountain spillway, scupper or spout, it is advised to install with a 1-2 degree angle down towards the waters exit of the water feature product.
Setting/Adhering
Plumbing should never support the weight of the fountain or pool water feature product alone. Construction adhesive or mortar should be used to support and strengthen the product into water feature.
Weight Support
When installing linear water feature products, it is essential to install supports to ensure that the minimal weight rest on the scupper, spillway or spout and the weight is distributed evenly. In concrete block applications, a bond beam or lintel must be installed to support the weight above the water feature product. Bond beams are usually made from bent rebar and Lintels can be made from angle iron.
Start-Up & Water Volume
Upon start up of your fountain or pool with water scuppers, spillways or spouts, keep valves shut or only slightly opened to allow water to fill plumbing and water feature products. Check all plumbing for leaks prior to increasing water volume. Slowly increase the water volume by opening the control valve until water is at desired projection. Acceptable water volumes for each product can be found on the product detail page on our website. Using products over the tested water volume may damage the product or shorten it's life.
Have More Questions?
Installation is best left to professionals or DIY’er with plumbing and contracting experience. Many issues result from improper installation, and these instructions cannot cover the various issues that may arise from your individual installation. If you have any questions or concerns about installation, please contact us for assistance.